Overview
Ready to get started with the illumin Classic Canvas? You've come to the right place. This quickstart guide takes you from zero to hero in about 60 minutes, or so. You'll learn essential platform operations and create a ready-to-publish campaign.
Eventually, you'll need a few digital assets to complete the guide's demo workflow. If you don't have any files on hand, you can leave the tactic placeholders empty or use the attached files as filler content.
Take a 45-second tour?
Click the gif to open a workflow tour. See all the buttons and forms you need to build a journey.
What is Classic Canvas?
It's our traditional line-item builder that lets marketers design, build, and publish campaigns swiftly and easily. The workflow is remarkably intuitive and visually appealing, two traits that can help marketers quickly develop a deep understanding of the nuts and bolts that go into journey building.
Scope
You can build many types of campaigns on Classic Canvas. Far, far more than I can describe here. So, I'll demo one type - a campaign that tracks website engagement because it's easy to explain (that's good for me) and covers all the essential building blocks (that's good for you). You'll learn how to:
You'll learn how to:
- upload a display creative
- create an audience
- set up pixel mapping
- configure campaign settings
- create a conversion goal
- add tactics to a campaign
- create a ready-to-publish campaign
Although you won't publish the demo campaign, I'll show you how to find reporting tools that you can use to understand and evaluate campaign data.
Contents
Click a link to jump to a section in this article.
- Part 1 Creating an org structure
- Part 2 Using the Library
- Part 3 Creating a campaign
- Part 4 Publishing and reporting
Part 1 Creating an org structure
Your first task is to create an agency and an advertiser. BTW, this task might have been completed for you during your illumin onboarding.
Every journey sits inside an advertiser, which is nested inside an agency. All your assets (i.e. creatives and audiences) belong to an advertiser. Imagine layers of child orgs inside a top-level parent org.
Opening the Settings page
To create a new agency or advertiser, or update an existing one, open the Settings page. Go to the top right corner and click the gear icon. The Settings page displays.
Creating an agency
To create an agency, expand the Agencies folder and click New Agency. A form displays.
- Enter an agency name.
- Enter address, contact, and time zone information.
- Confirm the default advertiser currency setting (i.e. All Currencies) or select a specific currency.
- Skip the Campaign Manager step for now and click Save & Next.
- The Targeting page displays. Skip that step for now and click Finish. Your agency is now visible on the page.
The Agencies table displays a list of agencies plus the number of associated advertisers and journeys. Click the pencil icon to review or update agency settings.
Creating an advertiser
To create an advertiser, expand the Advertisers folder and click New Advertiser. A form displays.
- Enter an advertiser name (e.g. a brand).
- Click the Category field and select an option that describes the general category or space of the advertiser.
- Select a currency.
- Click Save & Next.
- The Targeting page displays. Skip that step for now and click Finish.
The Advertisers table displays a list of advertisers plus the name of the associated agency. Click the pencil icon to review or update advertiser settings.
Part 2 Using the Library
The Library stores your audiences, creatives, and trackers. These digital assets are organized by advertiser. Before you upload or create platform assets, check the menu at the top of the page and confirm that the advertiser destination folder is correct. If it is not, open the menu and select the correct advertiser destination on the drop-down.
Creating an audience
The illumin platform has heaps of audience options. Way too many to mention here. For this guide, I'll show you one option: create an audience by selecting third-party segments from the Marketplace.
Start by opening the Marketplace window.
- Go to the top menu bar and click Library > Audiences.
- Click the New Audiences button. A new window displays.
- Select Marketplace.
- Click Next.
Go to the search field and enter a keyword related to the type of audience you want to target with this campaign. In this demo, I want to target baseball fans, so I enter baseball. BTW, the number in the Members column refers to devices, not people.
Below, I show you how to use filters (an optional but helpful step) to find active segments. Selecting an audience with an Active status saves time because that audience data is already sitting on the illumin platform, which means you can load it into a campaign and go live fairly quickly. Many segments have a Requires processing tag. These segments require time to download, which means they're not suitable examples for this quick-paced demo.
- Click the Filters icon.
- Go to the Status field and select Active.
- Click Apply.
- Scan the list and use checkboxes to select one or more segments. illumin adds each individual segment to the library.
Go to the bottom right corner and click the Add to New Library Folder button. This is an optional but recommended step because folders simplify file management and help you avoid agonizing delays when you can't find a file or remember its name. In the popup, enter a unique folder name and click Create. illumin adds the folder and audience to the Library > Audiences page.
Uploading a creative
To keep things simple, I want you to upload a single image file. (FYI, bulk uploads are possible. I discuss that feature in a different article.) Later, you'll drop that creative into a campaign tactic when you create a campaign on Classic Canvas. At some point, but not right now, you'll want to learn these ad tech industry creative options and file specs.
BTW, if you don't have an image file that meets illumin's specs, download and use the image file attached to this article.
To upload an image file:
- Go to the top right corner of the page and click Library > Creatives.
- Click the Add Creative button.
- Select Single Upload.
- In the slider panel, select Display > Hosted > Standard.
- Click the Select file button and upload a file from your device. A new form displays.
- Click the folder field and select New Folder (optional but recommended).
- In the new field, enter a unique, descriptive name.
- Go to the Click URL field and paste in the website page URL (or UTM code) that should display after a user clicks (or taps) this image.
- Ignore the other fields for now. They're optional.
- Scroll down and click Add.
illumin adds a row to the Creatives table. Go to the Creatives table and expand the folder. To review or edit file settings, go to the row and click the pencil icon.
Mapping a pixel
We're tracking website activity in this demo, so we need a pixel. I'll show you how to create a Universal Pixel that tracks activity on every website page. There's lots to learn about pixels and mapping, so be sure to read this primer when you're ready to take your knowledge of the illumin platform to the next level.
- Go to the top menu and select Library > Trackers.
- Click the New Tracker button.
- In the popup, enter a unique name and select Universal Pixel.
- Click Create. The Overview page displays.
Contact your web dev team and ask them to add the code to the site. Click the Copy Tracker Code button on the Overview page and paste this code on all web pages before moving on to the mapping section below.
Next, you'll map website page visits to a single audience.
- Make sure the Mapping tab on the left-hand menu is selected.
- Click the New button. A side drawer displays.
- Select URL.
- Add a unique mapping name (e.g. All pages).
- Enter the domain URL with a backslash and asterisks (*). This nifty trick tells illumin to track every page with the same root domain.
- Click Create.
Let’s create an audience for that website mapping.
- Select the Actions tabs on the left-hand menu and click New. A side drawer displays.
- Select the Audience tile.
- Enter an action name. I suggest adding the mapping name (e.g. All Pages) for quick recognition.
- Click the Mapping field and select the mapping you want to associate with this action.
- Click the Audience field and select New Audience. Two fields display.
- Enter an audience name (e.g. All Pages).
- Click Create.
When complete, click the Mapping and Actions tabs to review the results. Click the three-dot icon to update or delete a record.
Part 3 Creating a campaign
You made it this far! Congrats—the heavy lifting is done. Now, we'll open the Classic Canvas wizard and follow the prompts. Click the Journeys link in the top menu bar and then click the New Journey button.
In the popup, select Classic Canvas and click Start. The wizard displays. On the General Settings & Billing form, click the Advertiser field and select an advertiser (i.e. the one created earlier). Enter a journey name.
Scroll down to the Open Web DOOH Details heading. In the Category field, select the option that best describes the content of your campaign. Then, enter the website domain.
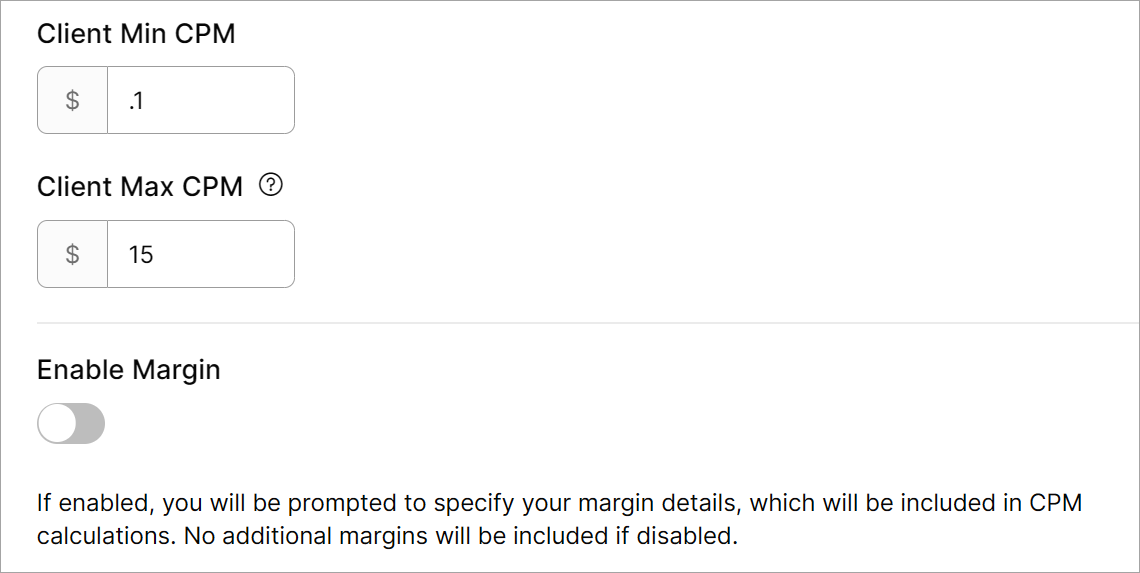
For the Enable Cross Device field, select Enable for now, but be sure to read about the pros and cons of this feature in this article. Go to the CPM fields and enter values (learn about CPM rates here). You can change these rates later when you build a campaign. Leave the Enable Margin to toggle off for now (learn about the margin feature here). Click Save and Next button.
Open Web trackers
On the Open Web Trackers page, go to the Tracker Type field and select Universal Pixel (if it isn't auto-selected). Click the Tracker field and select an option.
Click the New Conversion Action button and define your conversion. Because the pixel tracks visits to all website pages (that's how we set up the Universal Pixel a bit earlier, remember?), let's create an Engagement goal.
- Go to the Action Name field and enter a unique name. I’ll enter All Pages. so that its purpose is easy to understand. FYI, did you notice the period after All Pages? That’s purposeful, not poor punctuation. Because every name must be unique, the period lets me use a familiar label and enter a unique name.
- Click the Mapping field and select the appropriate mapping file. In this example, it’s All Pages.
- Go to the Conversion Type field and select an option. I'll select Site Engagement.
- Scroll down to the Conversion value field and enter a value (e.g. $15). The illumin algorithm treats these numbers as conversion action weights. The system uses those weights to optimize actions with a relatively higher value.
- Leave the default values in the other fields for now.
Click Add. illumin displays the conversion action in the form. Click Save and Next to keep changes and go to the next wizard step.
Open Web & DOOH targeting
You've likely seen the Targeting list before at the Advertiser level. I won't cover the details here. Most of the options are über self-explanatory. If you want to learn more and don't mind tumbling into a rabbit hole, read all about these targeting parameters.
Assuming you skipped the rabbit hole for now, go to the bottom right corner of the page and click Next. The final wizard step is a review. You can edit the settings or click Finish and (finally, phew) open the canvas.
Creating a campaign
illumin opens a blank canvas. That's where you create campaign magic. Your work begins with a campaign, a framework that ties together the audience, creatives, strategy, and goals. I explain that workflow in this article. Campaign building is a remarkably intuitive process, but there are a few moving pieces that need to be managed.
When you finish creating a campaign on Classic Canvas, it might look like my demo in the screenshot below.
Part 4 Publishing and reporting
Assuming you've built a campaign loaded with tactics, it's time for a sit up straight and pay close attention review. Triple-check everything, and then check one more time. Done? Cool. The campaign is ready to publish.
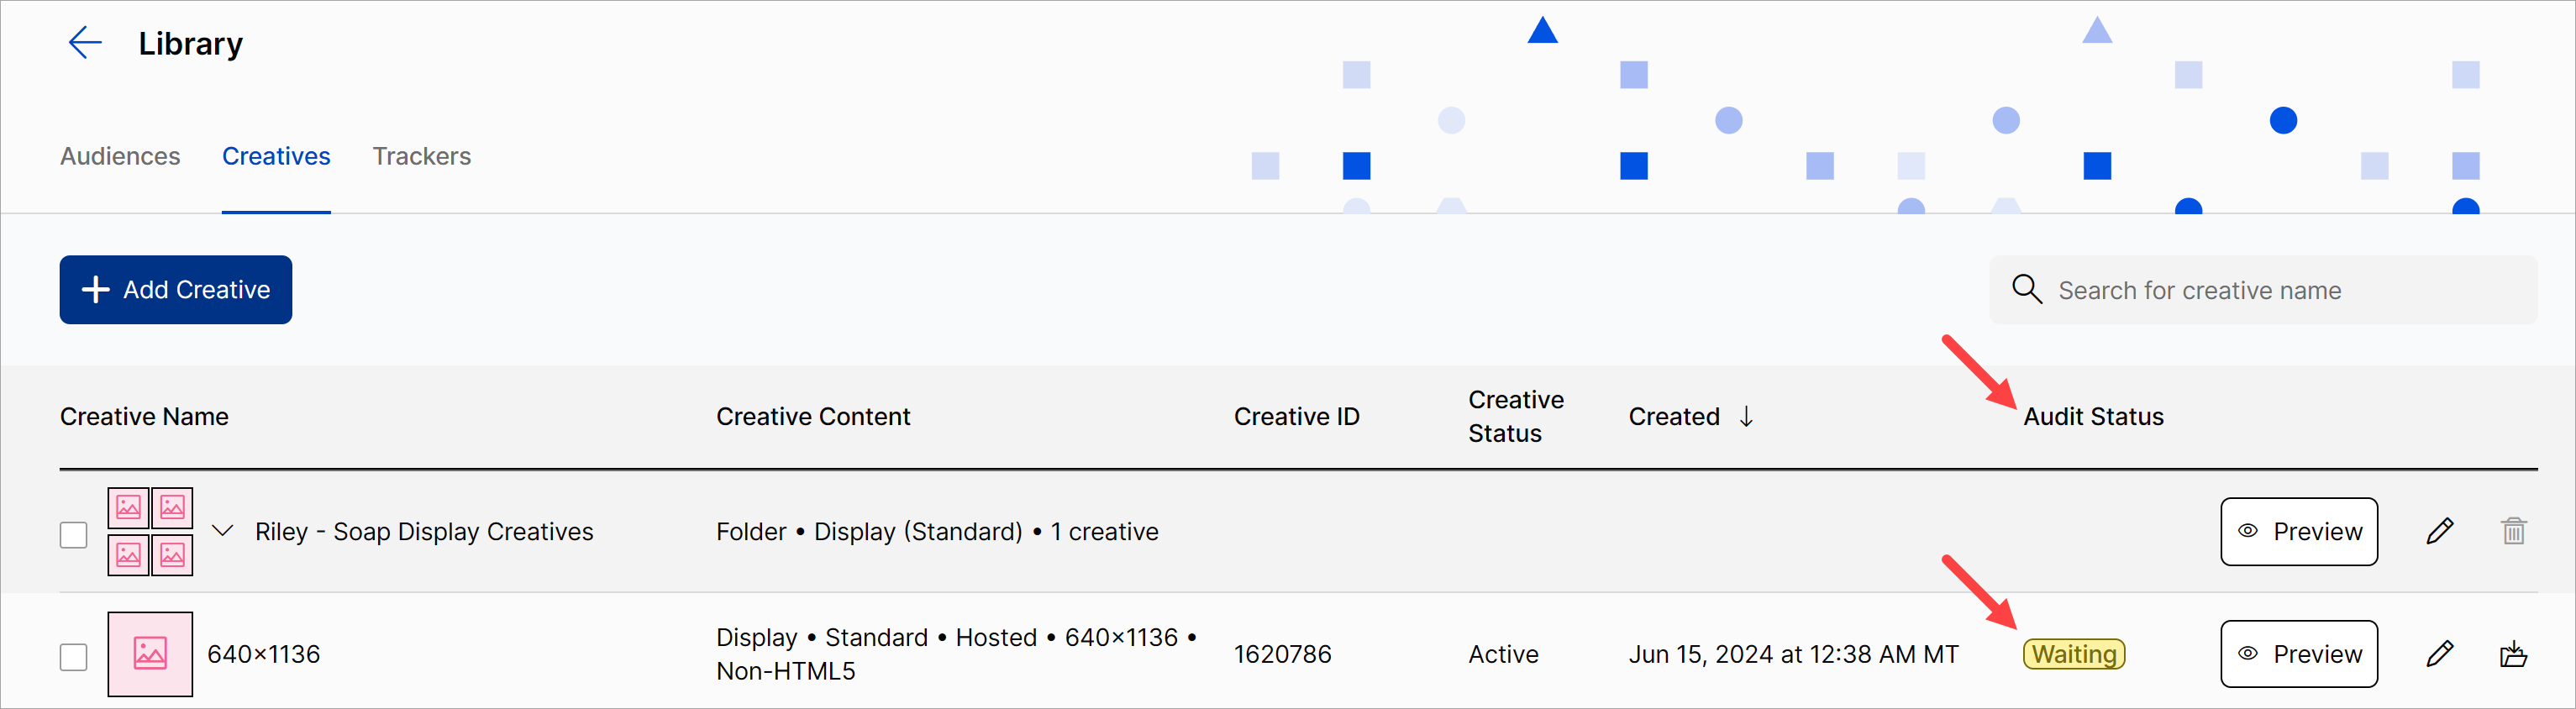
After you click Publish, the creatives are inspected by two external agencies (Google and AppNexus). That process normally takes 1-2 hours. During that time, the status of the creatives changes to Waiting on the Library > Creatives page. If all is well, the status changes to Approved. If there is a problem, the status changes to Mixed or Rejected. Click the status icon to learn which exchange had a problem with the creative and an explanation. If you can't figure out why a creative was rejected, contact the illumin support team.
If an audit agency rejects one or more creatives, the creatives can still be served on other exchanges - but not on the exchange that rejected the creative.
Reporting
After the campaign goes live and results start to come in, you'll want to review the data, inspect the campaign's performance, and tweak campaign settings to optimize outcomes.
illumin has several reporting options.
Predefined Reports
Save time and get the information you need with on-demand templates. Choose a report type, select your dimensions and metrics, and presto - ready to read or export campaign performance data. Learn how to get informed fast.
Report Builder
Build a custom report from scratch with the metrics you value most. Learn how to build a custom report.
BTW, you can save Predefined and Report Builder reports for later use. If you're a data junky and need a steady supply of campaign reporting, create a report schedule, and illumin will email the reports to your Inbox on a fixed schedule.
Related articles
Manage Campaign Creatives on Classic Canvas
Create a Campaign on Classic Canvas
Configure Open Web & DOOH Targeting
Manage the Enable Cross Device Option